
Building Your Own Coils: A Step-by-Step Guide to Advanced Vaping
24th Aug 2023
Advanced vaping has gained popularity among vaping enthusiasts for the ability to customize the vaping experience and achieve enhanced flavor and vapor production. Building your own coils is an essential skill for those looking to take their vaping journey to the next level. In this step-by-step guide, we will walk you through the process of building coils, from understanding the basics to advanced techniques.
Understanding Coils
Before diving into coil building, it's important to have a solid understanding of coils themselves. Coils are the heating elements responsible for vaporizing the e-liquid in your atomizer. There are various types of coils available, including single, dual, and quad coils, each offering different characteristics and performance.
When building your own coils, the choice of coil material is crucial. Different materials such as Kanthal, stainless steel, and nickel offer distinct properties that impact the overall vaping experience. Furthermore, understanding resistance and Ohm's law is essential to ensure safe vaping and optimal performance.
Tools and Supplies
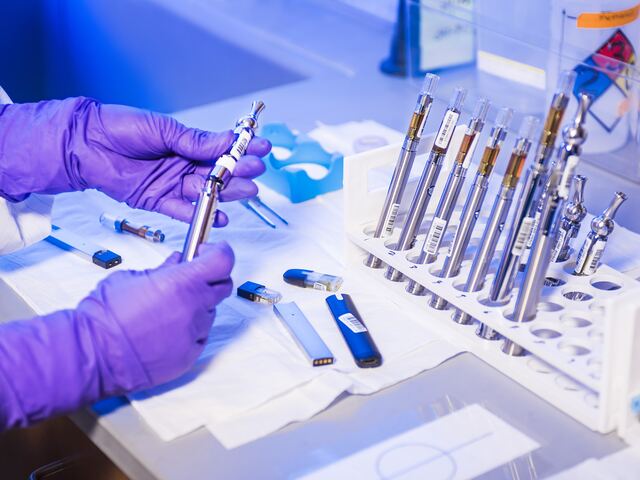
To begin your coil-building journey, you'll need a few essential tools and accesories. These include wire cutters, ceramic tweezers, an ohmmeter, and a coil jig or screwdriver set. Additionally, selecting the right wire is crucial, as it determines the coil's resistance and performance. Consider factors like wire gauge, material, and coating when choosing your wire.
Preparing the Wire
Start by straightening the wire to ensure a uniform and even coil. You can achieve this by holding one end of the wire with the ceramic tweezers and gently pulling the wire through the tips. Once straightened, measure and cut the appropriate length of wire, considering the desired number of wraps and coil diameter.
Wrapping the Coil
Now it's time to wrap the coil around a jig or screwdriver of suitable diameter. Coil wrapping techniques vary, but a common approach is to hold the wire against the jig and rotate it, ensuring tight and closely spaced wraps. The number of wraps and coil diameter will depend on your preference and the desired resistance.
Experimenting with different coil configurations, such as single, dual, or even more complex designs like twisted or parallel coils, can yield unique and varied vaping experiences.
Installing the Coil
Selecting the right atomizer is crucial for a successful coil-building experience. Ensure your atomizer is compatible with the coil's resistance and provides enough space for installation. Before mounting the coil, it's essential to clean the atomizer thoroughly to remove any debris or residue. Once clean, carefully insert the coil into the designated posts or slots, making sure it is centered and secured.
Checking and Adjusting Resistance
To ensure a safe vaping experience, it's crucial to check the resistance of your coil. An ohmmeter or a regulated mod with resistance-checking capabilities can be used for this purpose. Use a coil resistance calculator to estimate the expected resistance based on the wire type, number of wraps, and coil configuration. Adjust the coil if needed to achieve the desired resistance.
Wicking Your Coil
Wicking plays a vital role in delivering e-liquid to the coil effectively. Select an appropriate wicking material, such as organic cotton or silica, and thread it through the coil. Ensure the wick has enough thickness to provide proper e-liquid absorption, but not too tight to hinder the wicking process. Trim the excess wick, leaving enough to reach the e-liquid reservoir.
Priming and Testing
Before using your newly built coil, it's essential to prime it to avoid dry hits. Apply a few drops of e-liquid onto the coil and saturate the wick thoroughly. Assemble your atomizer, fill it with e-liquid, and allow it to sit for a few minutes to ensure proper saturation. Once primed, test the coil by gradually increasing the wattage and checking for even heating and vapor production.
Advanced Coil Building Techniques
Once you have mastered the basics of coil building, you can explore advanced techniques to further enhance your vaping experience. Clapton coils, fused claptons, alien coils, and staggered coils are examples of intricate coil designs that offer increased surface area, resulting in enhanced flavor and vapor production. Experiment with different techniques and coil configurations to find your preferred vaping style.
Safety Tips and Precautions
While coil building can be an enjoyable and rewarding experience, it's essential to prioritize safety. Always adhere to battery safety guidelines, such as using high-quality batteries, checking for any damage, and using suitable chargers. Understanding Ohm's law and staying within safe resistance limits is crucial to prevent battery failures and potential hazards. Handle and store your vaping equipment with care to ensure longevity and safety.
Cleaning and Maintenance
Regularly cleaning your coils can extend their lifespan and maintain optimal performance. Remove the atomizer from your device and rinse it under warm water, gently brushing off any residue or gunk. Dry the atomizer thoroughly before reassembling. If you notice a decline in flavor or vapor production, it may be time to replace the old coil with a new one.
Getting Started with Coil Building
Building coils is a skill that improves with practice and experimentation. Don't be discouraged if your first attempts don't meet your expectations. Joining vaping communities, watching tutorial videos, and engaging in discussions can help you learn and improve your coil-building skills. Embrace the process and have fun exploring the endless possibilities of coil customization.
Conclusion
Building your own coils is a fantastic way to personalize your vaping experience. By understanding the basics, selecting the right tools and supplies, and following the step-by-step process, you can create custom coils tailored to your preferences. Experiment with different wire types, coil configurations, and vaping techniques to discover your ideal setup. Remember to prioritize safety, stay within recommended resistance limits, and enjoy the journey of advanced vaping.
FAQs
Is building your own coils difficult?
Building your own coils requires practice and patience, but it becomes easier with time. Start with simple coil designs and gradually progress to more advanced techniques.
Is coil building suitable for all types of atomizers?
Coil building is compatible with rebuildable atomizers (RBAs) and rebuildable dripping atomizers (RDAs) that provide the necessary space and post configurations for installing coils.
Can I use any wire for coil building?
Different wires offer distinct properties and affect the vaping experience. Kanthal is commonly used for its simplicity, while stainless steel and nickel provide temperature control capabilities.
How often should I replace my coils?
Coil lifespan varies depending on factors such as usage, e-liquid sweeteners, and care. Generally, coils may last anywhere from one to three weeks before requiring replacement.
Can I achieve better flavor and vapor production with coil building?
Yes, building your own coils allows for customization, enabling you to fine-tune the vaping experience to your liking. By experimenting with different coil configurations, wire types, and wicking techniques, you can enhance flavor and vapor production.