How to Make Your Own Electronic Cigarette Juice
28th Sep 2025
Making your own vape juice is one of the most rewarding parts of vaping. It's less about complex chemistry and more about becoming a flavor artist, creating something that's perfectly yours. You're essentially mixing four basic ingredients—Propylene Glycol (PG), Vegetable Glycerin (VG), a nicotine base, and flavor concentrates—to craft your ideal vape experience from the ground up.
The whole process gives you complete control over every nuance, from the warmth and thickness of the clouds to the precise nicotine sensation you're looking for.
Why Bother Making Your Own E-Liquid?
At first, mixing your own e-liquid can sound intimidating, but think of it more like culinary craft than a science experiment. You're stepping away from the one-size-fits-all options on the shelf and creating a truly bespoke experience. It’s not just about one thing; it’s the fusion of creative control, cost savings, and a perfectly tailored vape that truly changes the game.
The reasons people get into DIY are pretty compelling. Most of us start because we want to tweak something the pre-made juices just can't get right.
- Total Flavor Control: This is the big one. You're the chef. Ever craved a super-ripe mango with just a whisper of cooling menthol, or a decadent vanilla custard layered with a crisp graham cracker finish? If you can dream it up, you can mix it.
- Pinpoint Nicotine Accuracy: Whether you're trying to hit a very specific nicotine level that stores don't carry or you're methodically tapering down, DIY lets you measure it with surgical precision.
- The Perfect Cloud: Love massive, dense clouds that hang in the air? Or maybe you prefer a more discreet, flavor-forward puff? Adjusting your PG/VG ratio gives you complete command over the throat hit and vapor production, so it performs perfectly with your vape setup.
This desire for a more personalized vape is a huge part of what's driving the industry's innovation. As more people start vaping, the demand for custom options just keeps growing. In fact, the global e-cigarette market is expected to hit a staggering USD 42.8 billion by 2029, and a lot of that growth comes from vapers who want more control over what they're using. You can see the full market breakdown on Research and Markets.
When you take the reins yourself, you guarantee every single bottle is mixed exactly the way you like it. It's about so much more than just saving a few bucks—it's about creating your perfect vape, every single time.
Finding the Best Ingredients and Gear
Before you can even think about mixing your first batch, you have to get your hands on the right raw materials. Sourcing high-quality ingredients is probably the single most important step in the entire process. Think of it like cooking a gourmet meal—the quality of what you put in dictates the brilliance of what you get out.
Thankfully, you're not on your own here. There are plenty of reputable online suppliers that cater specifically to the DIY vaping community. The golden rule is to always hunt for pharmaceutical-grade (USP/EP) ingredients. This stamp of quality ensures you're starting with a pure, clean, and safe foundation for whatever flavor masterpiece you have in mind.
What Goes Into a Bottle of E-Liquid?
At its core, all e-liquid is a combination of four main ingredients. Getting a feel for what each one does is crucial to understanding how to tweak your recipes later on. This isn't new science; vapers have been fine-tuning these blends for over a decade, chasing that perfect balance of flavor, cloud production, and nicotine satisfaction. The e-liquid market has come a long way, and you can get a sense of its journey with these insights from Cognitive Market Research.
Let's break down the core components you'll be working with.
Core Ingredients and Their Functions in E-Liquid
This table breaks down the core components of DIY e-juice, explaining the role of each ingredient in the final product.
|
Ingredient |
Abbreviation |
Primary Function |
Common Percentage in Mix |
|
Propylene Glycol |
PG |
Carries flavor and provides "throat hit" |
30% - 70% |
|
Vegetable Glycerin |
VG |
Creates dense vapor clouds and adds sweetness |
30% - 80% |
|
Liquid Nicotine |
Nic |
Provides the nicotine effect |
Varies (e.g., 3-12 mg/mL) |
|
Flavor Concentrates |
Flavors |
Creates the desired taste and aroma |
5% - 20% |
As you can see, Propylene Glycol (PG) is a thin liquid that does an amazing job of carrying flavor and nicotine. It's also what provides that "throat hit," a sensation many people who switched from smoking really appreciate.
On the other hand, you have Vegetable Glycerin (VG). It’s a much thicker, slightly sweet liquid that's responsible for producing those big, dense clouds of vapor. Then there’s your Liquid Nicotine Base, which is simply concentrated nicotine suspended in either PG or VG. This is the one ingredient you must handle with extreme caution, but we’ll get into safety in much more detail later.
Finally, the fun part: Flavor Concentrates. These are food-grade flavorings specifically designed to be vaped. This is where your creativity comes alive, letting you craft anything from a simple, bright strawberry to a multi-layered lemon meringue pie.
Your PG/VG ratio is what really defines the character of your e-liquid. More PG means more flavor and a sharper throat hit. More VG means a smoother vape with way bigger clouds. A 50/50 blend is a fantastic, well-balanced starting point for most people.
Assembling Your Mixing Toolkit
Besides the liquids themselves, you'll need a few essential tools to make sure your mixes are accurate, consistent, and safe. Precision is everything in DIY. A tiny miscalculation can throw off your entire recipe, so investing in the right gear from day one will save you a lot of frustration.
Here’s a quick shopping list of what I consider non-negotiable:
- Digital Scale: This is your most important tool. Grab a small jewelry scale that measures down to 0.01g. Mixing by weight is infinitely more accurate and cleaner than trying to measure liquids by volume.
- Empty Bottles: You'll need somewhere to mix and store your creations. Amber or other opaque plastic bottles (like the "Chubby Gorilla" style) are ideal because they protect your e-liquid from light, which can degrade the nicotine and flavors over time.
- Nitrile Gloves: Don't even think about handling nicotine without them. This is a non-negotiable safety item to prevent any absorption through your skin.
- Syringes or Pipettes: While a scale is the best way to go, a few syringes can come in handy for measuring out tiny amounts of potent flavor concentrates where precision is key.
Once you have these items on your bench, you're officially ready to graduate from theory to practice. With quality ingredients and the proper tools, you’ve set yourself up for success.
Mixing Your First E-Juice Batch
Alright, you've got your ingredients laid out and your tools are ready. This is where the magic really begins—the moment you transform a few separate liquids into your own unique vape juice. We'll walk through this together, focusing on doing it right and staying safe, so your first mix is something you'll be proud of.
When it comes to combining everything, you have two main options: mixing by volume (with syringes) or mixing by weight (using a digital scale). I'll be honest, while syringes seem simple enough, nearly every seasoned DIYer I know mixes by weight. It's just plain better—it’s faster, way more accurate, and a whole lot cleaner. No more dealing with a sink full of sticky, hard-to-clean syringes.
Your Most Important Tool: The E-Liquid Calculator
Before a single drop goes into your bottle, you need to fire up an online e-liquid calculator. Think of it as your digital recipe book and personal chemist. These free tools are essential; they take all the complicated math and guesswork out of the equation.
You just plug in your target bottle size, desired nicotine level, and your preferred PG/VG ratio. The calculator does the heavy lifting, spitting out the exact weight you need for every single ingredient. It’s the key to getting consistent, repeatable results every single time you mix a batch.
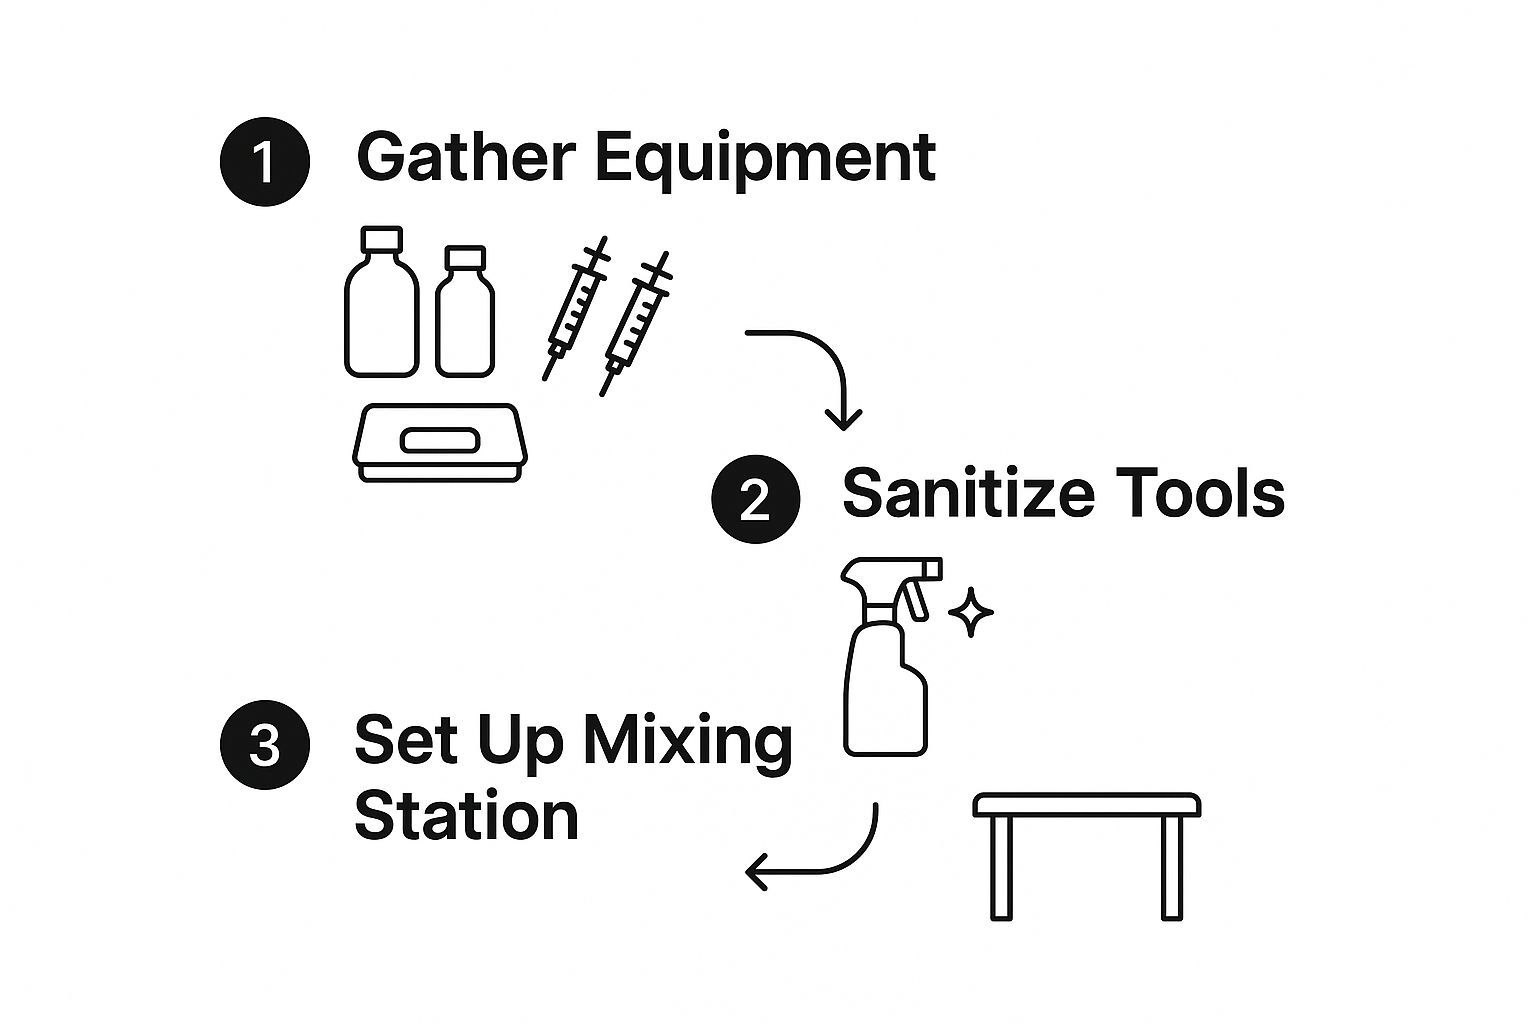
The image below gives you a bird's-eye view of the whole setup process, from getting your gear together to making sure your workspace is clean.

As you can see, a great mix starts with solid preparation long before you even uncap a bottle.
Let's Mix Something: A Simple Strawberry Milk
Theory is one thing, but let's make this real. We’re going to mix up a classic "Strawberry Milk" recipe. It’s a fantastic starting point for beginners because the flavors are straightforward and it tastes great almost immediately.
Here are the details we’ll punch into the calculator:
- Batch Size: 30ml
- Nicotine Level: 6mg/mL
- Base Liquid Ratio: 30% PG / 70% VG
- Nicotine Base: We're using a 100mg/mL concentrate suspended in PG.
And here are the flavorings that will bring it to life:
- Strawberry (Ripe): 6%
- Vanilla Bean Ice Cream: 4%
- Sweet Cream: 2%
Once that's all entered, the calculator will generate your recipe in grams. This is where your 0.01g digital scale becomes the hero of your setup.
My Two Cents: Never, ever skip the calculator. Trying to eyeball your measurements is a recipe for disaster. A calculator removes any chance of human error, keeps your nicotine levels safe and consistent, and lets you save and tweak your creations later.
The Mixing Process, Laid Out
With the recipe from your calculator in hand, it's time to actually mix. It's a surprisingly simple and satisfying process.
First, get your workspace ready. Pull on your nitrile gloves—safety first. Place your empty 30ml bottle on the scale and hit the 'tare' or 'zero' button.
Next, add the nicotine. I always do this first to avoid contaminating my larger PG, VG, or flavoring bottles with any stray nicotine drips. Carefully drip in your nicotine base until the scale hits the exact weight from your recipe.
Now for the fun part: the flavors. Add your first concentrate, then press 'tare' again. This resets the scale to zero, which makes measuring the next ingredient a breeze. Repeat this for each flavor concentrate, taring the scale every time.
After the flavors, add your Propylene Glycol (PG), and tare the scale one more time. Finally, add the Vegetable Glycerin (VG). VG is super thick, so pour slowly to make sure you don't overshoot your target weight.
Once all the ingredients are in, screw the cap on tight. Now, shake it like you mean it for a good minute or so. You'll see the liquids combine into a uniform, slightly cloudy mixture.
And that's it! You've officially made your first bottle of e-juice. The last thing to do is slap a label on it. Make sure to write down the recipe name, the date you mixed it, the nicotine strength, and the PG/VG ratio. Trust me, this little habit will save you a lot of headaches down the road.
Essential Safety Measures for Home Mixing

Learning how to make your own vape juice is a fantastic hobby, but this is the one part where you can't cut corners. Handling concentrated nicotine demands your full respect and attention. These aren’t just friendly suggestions; they're the bedrock rules that will keep you and everyone in your home safe.
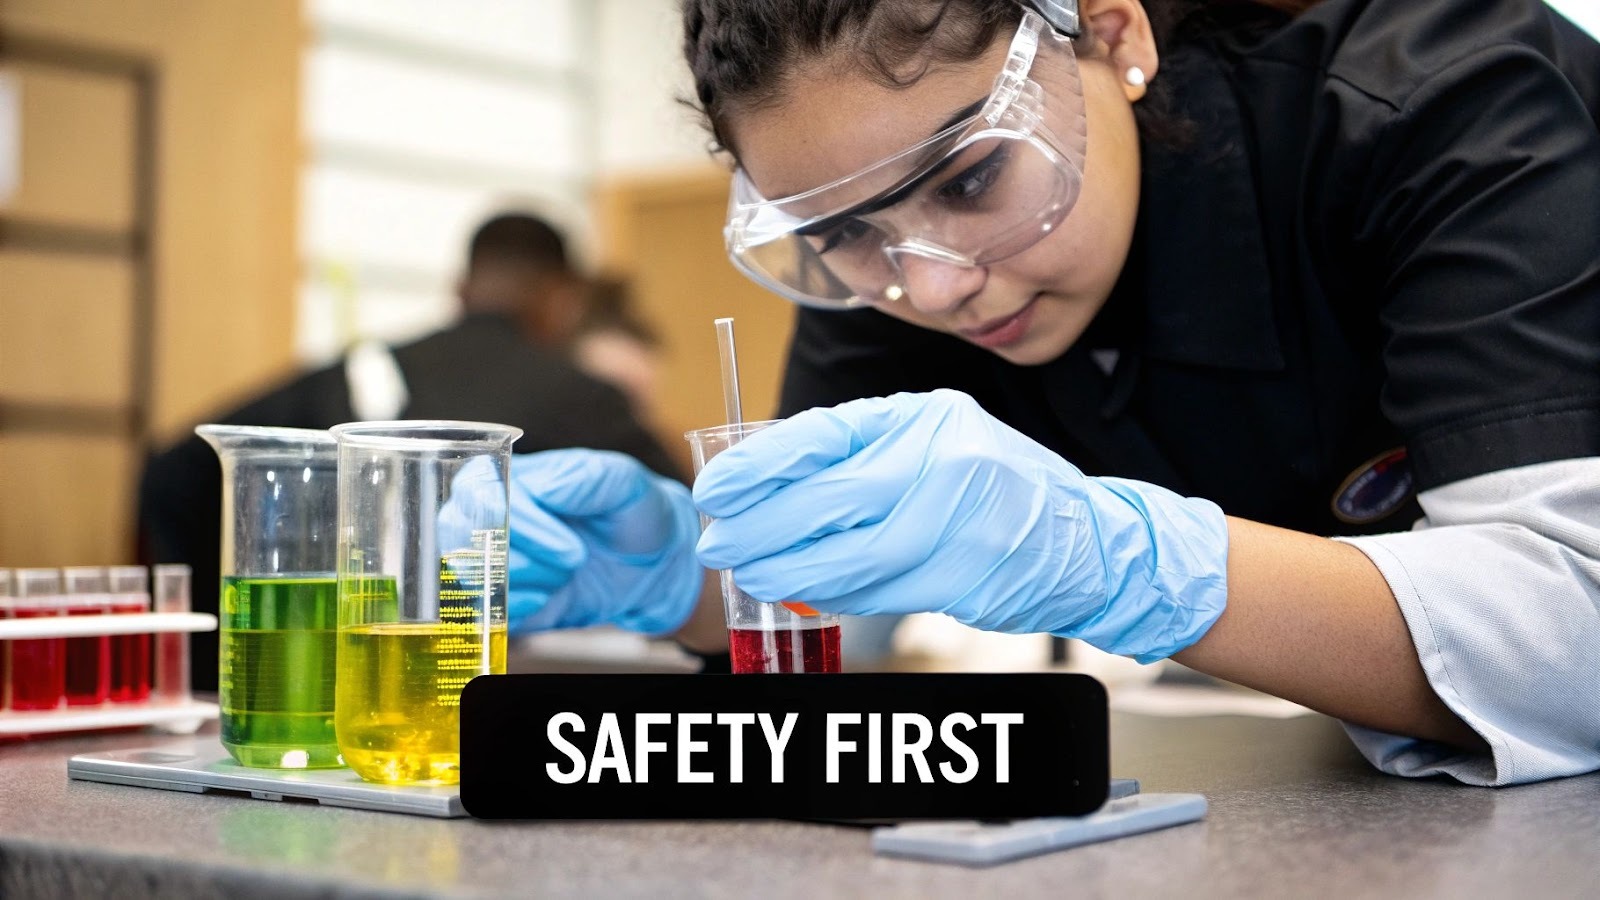
The absolute number one rule? Always wear personal protective equipment (PPE). Get yourself a good pair of nitrile gloves and some safety glasses, and consider them your mixing uniform. Concentrated nicotine can absorb right through your skin, making gloves a must-have. And trust me, you don’t want a stray splash of anything getting in your eyes.
Creating Your Safe Mixing Space
Where you mix is just as important as how you mix. You need to designate a specific spot that's clean, well-lit, and—most importantly—completely inaccessible to kids and pets. A dedicated desk in a room with a door you can lock is the perfect setup.
Before you even think about opening a bottle, make sure your surface is spotless and uncluttered. I like to lay down a silicone mat or even just some paper towels. It makes cleanup a breeze and contains any little drips.
A clean, organized workspace isn't just about looking professional; it's about preventing cross-contamination and reducing the chance of a clumsy accident. Treat your mixing station like you would a kitchen counter when you're preparing food.
Secure Storage Is a Must
Safely storing your supplies is just as critical as safely handling them. Your concentrated nicotine, in particular, needs to be treated with the utmost care.
Here are the non-negotiables for storing your DIY gear:
- Lock It Up: All nicotine must be kept in a securely locked box or cabinet. There's no exception here, especially if you have kids around.
- Keep It Cool and Dark: Light and heat are the enemies of both nicotine and your flavorings. They'll degrade over time. A cool, dark spot like a locked cupboard or even a dedicated mini-fridge works wonders.
- Label Everything Clearly: This seems obvious, but it's easy to forget. Every single bottle—nicotine, PG, VG, and flavors—needs a clear label with its name, the date you opened it, and the nicotine strength.
This level of control is a big reason why DIY is so appealing. People want to know exactly what’s in their juice. With the electronic cigarette juice market projected to hit USD 4.93 billion by 2030, it’s clear that vapers are taking control of their experience. When you follow these safety steps, you’re not just mixing e-liquid; you’re being a responsible hobbyist. You can dive deeper into the growth of the e-liquid market at Maximize Market Research.
Steeping Your E-Liquid for Peak Flavor

So you've mixed your first batch, and the urge to fill up your tank right away is almost unbearable. I get it. But hold on for a second. If you want to take that mix from "pretty good" to truly amazing, there's one final, crucial step: steeping.
Think of it like aging a fine wine or whiskey. Steeping is just the process of letting your e-liquid mature. It gives all those different molecules—the PG, VG, nicotine, and flavorings—time to properly bond and blend. A freshly shaken bottle often tastes a bit harsh or perfumey because the flavors haven't truly fused yet. Steeping rounds off those sharp edges and deepens the flavor, turning a decent mix into an all-day vape you won't want to put down.
Simple Steeping Methods Anyone Can Do
The classic, go-to method is what we call the "cabinet steep." It's as simple as it sounds. Just stick your tightly sealed bottle in a cool, dark place—a drawer, a cupboard, a shoebox—and forget about it for a while. Patience is your best friend here.
To help things along, I always make a point to give my bottles a really good, hard shake once a day. This reintroduces a little oxygen and makes sure everything continues to homogenize as it ages. Some people recommend "breathing" the liquid by leaving the cap off for an hour or two, but I'd be careful with that—it can sometimes mute your top notes, especially with delicate fruits. Start with just shaking.
Steeping won’t turn a bad recipe into a good one. What it will do is unlock the full potential of a good recipe, letting your flavors harmonize and truly come alive.
How Long Should You Steep Your Juice?
This is where the art comes in, because different flavor profiles mature at wildly different speeds. A simple, bright fruit flavor might be perfect in a couple of days, while a rich, complex custard needs weeks to really hit its stride.
Here are some general guidelines I've developed over years of mixing:
- Simple Fruit & Menthol Flavors: These are your instant gratification mixes. They're often great right off the shake or after just 1-3 days. In fact, over-steeping can sometimes kill the vibrant pop of a fresh fruit flavor, so taste these early.
- Complex Fruit Blends: When you start layering multiple fruits, you'll want to give them about 3-7 days. This gives all the different notes a chance to settle in and find their balance.
- Creams, Custards, and Bakeries: This category is where patience pays off big time. You're looking at a minimum of 2-4 weeks for these. Trust me, the change is dramatic; they become incredibly rich, creamy, and smooth.
- Tobacco Flavors: Much like custards, tobaccos need time to let their deep, nuanced notes develop. I'd give them at least 2 weeks, sometimes longer for really complex blends.
Ultimately, this is all about your own palate. The best advice I can give is to experiment. Make a batch, try a little every few days, and take notes. You'll quickly get a feel for how your favorite recipes evolve and learn exactly when they hit that perfect sweet spot.
Ready to Level Up? Here Are a Few Pro Tips
Once you've got the hang of the basic mixing process, the real fun begins. This is where you move past following simple, one-note recipes and start becoming a true juice artist, creating complex flavors that are all your own.
The secret to those amazing premium e-liquids you love? It’s all about flavor layering. Instead of just reaching for one type of strawberry, think about combining two or three different ones. Maybe you blend a ripe, juicy strawberry with a sweet candy strawberry, then add a hint of strawberry jam for richness. This creates a depth and complexity that a single flavor concentrate just can't match.
Dialing in Your Ratios for the Perfect Vape
Another trick of the trade is learning to adjust your PG/VG ratio to suit your specific vape setup. There's no single "best" blend; it’s all about creating the perfect partnership between your e-liquid and your device.
- For Big Clouds & Sub-Ohm Tanks: If you're using a powerful sub-ohm tank, you'll want a thicker liquid. Go for at least 70% VG. This helps prevent your tank from leaking and is the key to producing those massive, dense clouds.
- For Pod Vapes & Smaller Devices: Those compact pod systems work best with thinner juice. A classic 50/50 blend is usually perfect, but sometimes a 60% PG mix is even better. It wicks faster in smaller coils, giving you a crisp flavor and a more pronounced throat hit without flooding the device.
Don't get discouraged if a mix doesn't turn out perfectly on the first try. If it tastes harsh, you might have overdone it with the nicotine or a specific flavoring. If the flavor seems weak, it could be "vaper's tongue," or the juice might just need a little more steeping time to come alive.
This whole process is a journey of trial and error. Experiment, have fun with it, and always, always keep safety in mind. As you get deeper into the craft, remember that nicotine is an addictive chemical. You can find more detailed information on the FDA's official resource page.
Got Questions? Let's Talk DIY E-Juice
Diving into DIY e-juice is exciting, but it's totally normal for a few questions to pop up along the way. Even with the best instructions, you'll run into things that make you pause. Let's walk through some of the most common questions new mixers have so you can get back to creating with confidence.
How Long Will My Homemade E-Juice Last?
If you store your juice properly, it can actually last quite a while. Tucked away in a cool, dark place like a cupboard or drawer, your creations can be good for up to two years.
That said, for the absolute best flavor and nicotine strength, you’ll probably want to use it within the first year. Before you vape any older juice, just give it a quick check—if the color has changed dramatically or it smells off, it's best to mix a fresh batch.
Is It Really Cheaper to Make Your Own Vape Juice?
Without a doubt, yes. There's an upfront cost, of course—you'll need to grab your supplies like bottles, syringes, and bulk ingredients. But once you have your setup, the cost per bottle plummets.
Most people find they can make juice that tastes better than premium store-bought brands for a tiny fraction of the price. The savings add up incredibly fast.
What’s the Right PG/VG Ratio for Me?
This one comes down to your personal taste and the gear you're using. There’s no single "best" answer, but here are some solid starting points:
- A balanced 50/50 PG/VG mix is perfect for smaller, lower-power devices, often called mouth-to-lung (MTL) setups. This ratio is fantastic for carrying flavor and gives you a nice throat hit.
- A 70/30 VG/PG blend is the go-to for most sub-ohm tanks and high-power devices. You’ll get a much smoother vape with dense, satisfying clouds.
The real beauty of DIY is the freedom to experiment. Your perfect mix is just a few adjustments away, giving you complete control over your vaping experience from the first drop to the last cloud.
Ready to skip the mixing and find your next all-day vape? Inline Vape has you covered with the latest e-liquids, starter kits, and disposables.
Explore our massive selection at https://www.inlinevape.com
Nicotine is an addictive chemical. Content intended for adults 21+.

